
Overview
After installing DealForge, an administrator completes a one-time setup to connect DealForge to the org. Once setup is complete, the Launchpad is where everyone opens each DealForge app.
images/setup-launchpad/overview.pngSetup and Launchpad overviewComplete DealForge Setup
DealForge connects to your org through its own API connection. An administrator completes the steps below once.
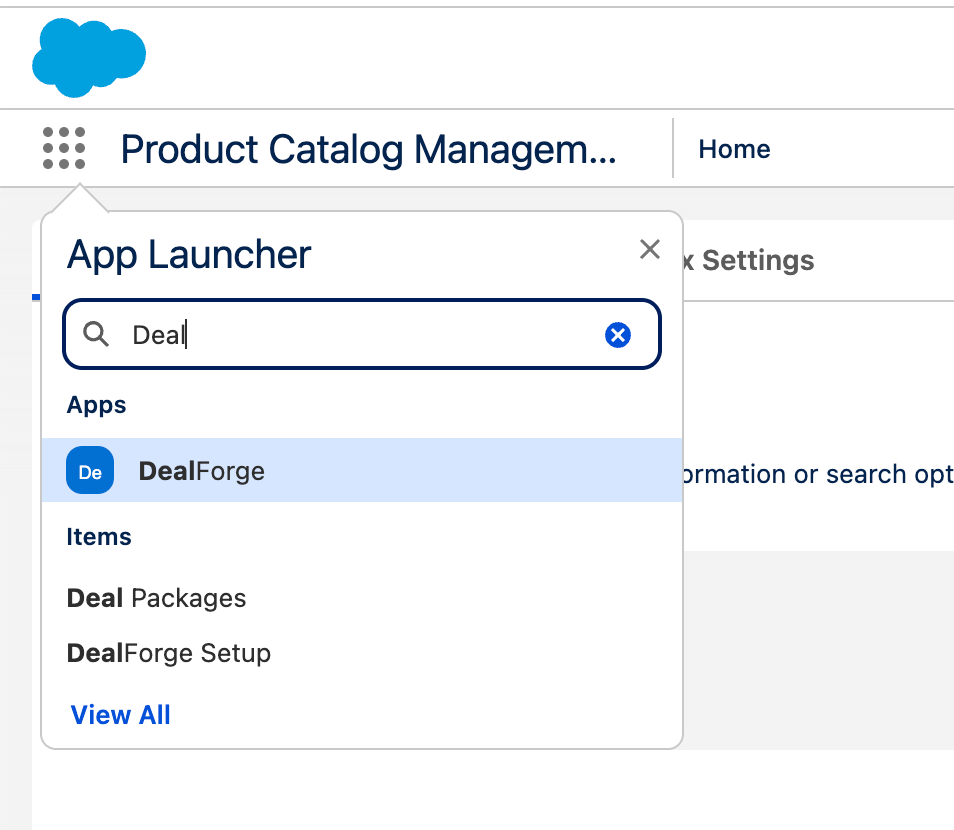
- Open the App Launcher, search for DealForge, and open the app.
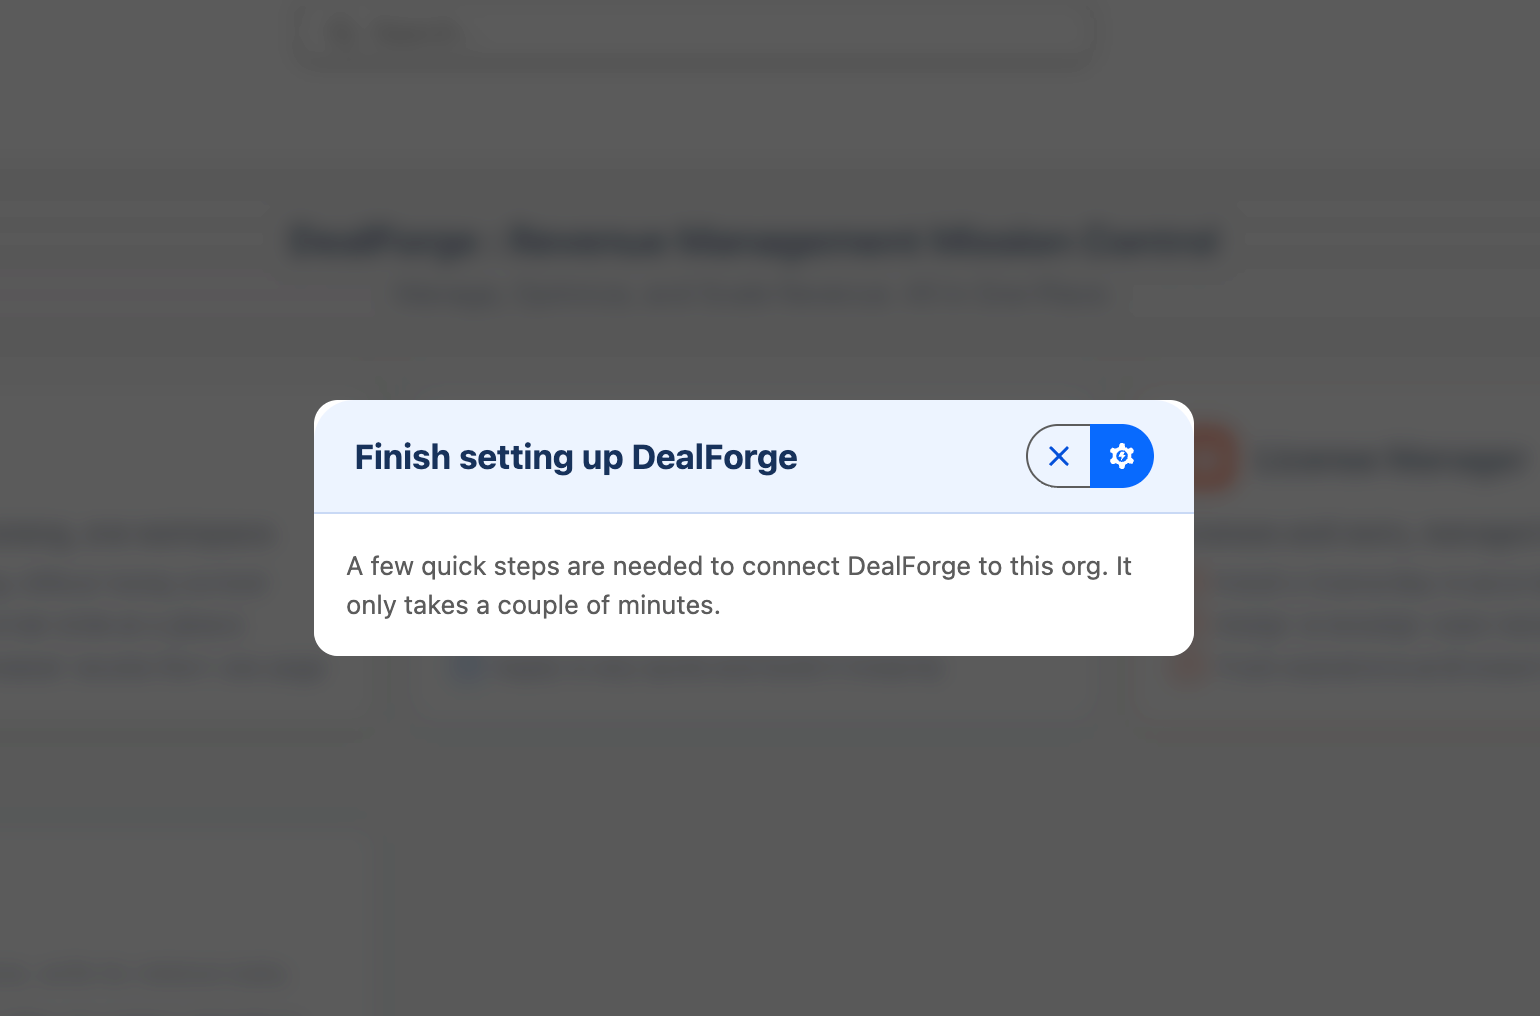
- Until setup is complete, a Finish setting up DealForge prompt appears. Click Open setup to open DealForge Setup. If you click Remind me later, you can open the DealForge Setup tab from the App Launcher at any time.
images/setup-launchpad/setup-prompt.pngFinish setting up DealForge promptStep 1: Create an External Client App
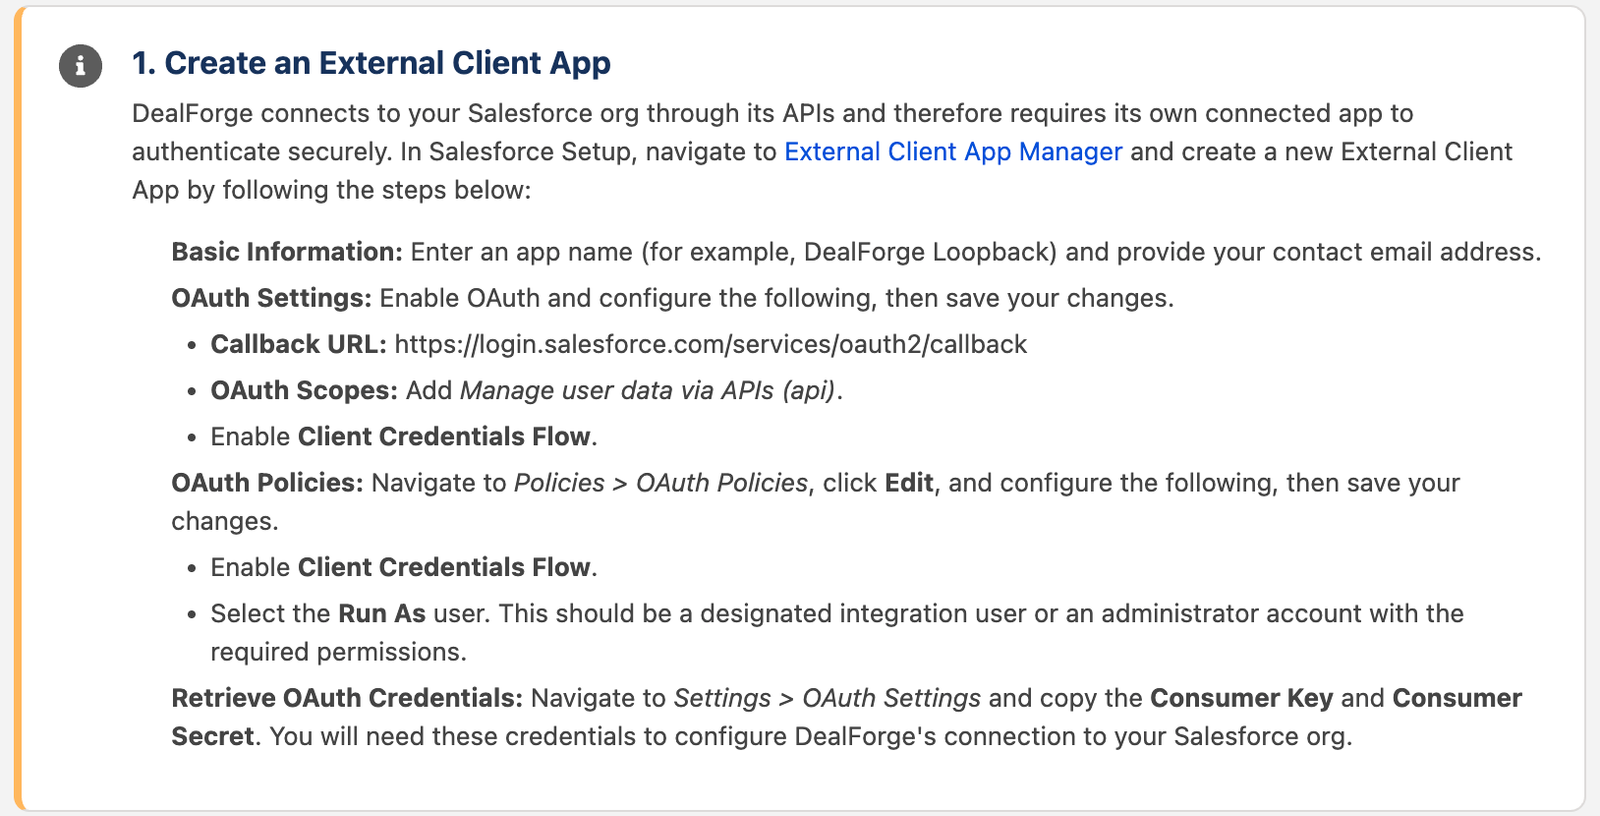
- In Salesforce Setup, open External Client App Manager and create a new External Client App.
- Basic Information: enter an app name (for example, DealForge Loopback) and your contact email address.
- OAuth Settings: enable OAuth, then set the Callback URL, add the Manage user data via APIs (api) scope, and enable Client Credentials Flow. Save your changes.
- OAuth Policies: go to Policies > OAuth Policies, click Edit, enable Client Credentials Flow, and select the Run As user. This should be a designated integration user or an administrator account with the required permissions. Save your changes.
- Retrieve OAuth Credentials: go to Settings > OAuth Settings and copy the Consumer Key and Consumer Secret.
images/setup-launchpad/setup-step1.pngCreate the External Client AppStep 2: Create the connection
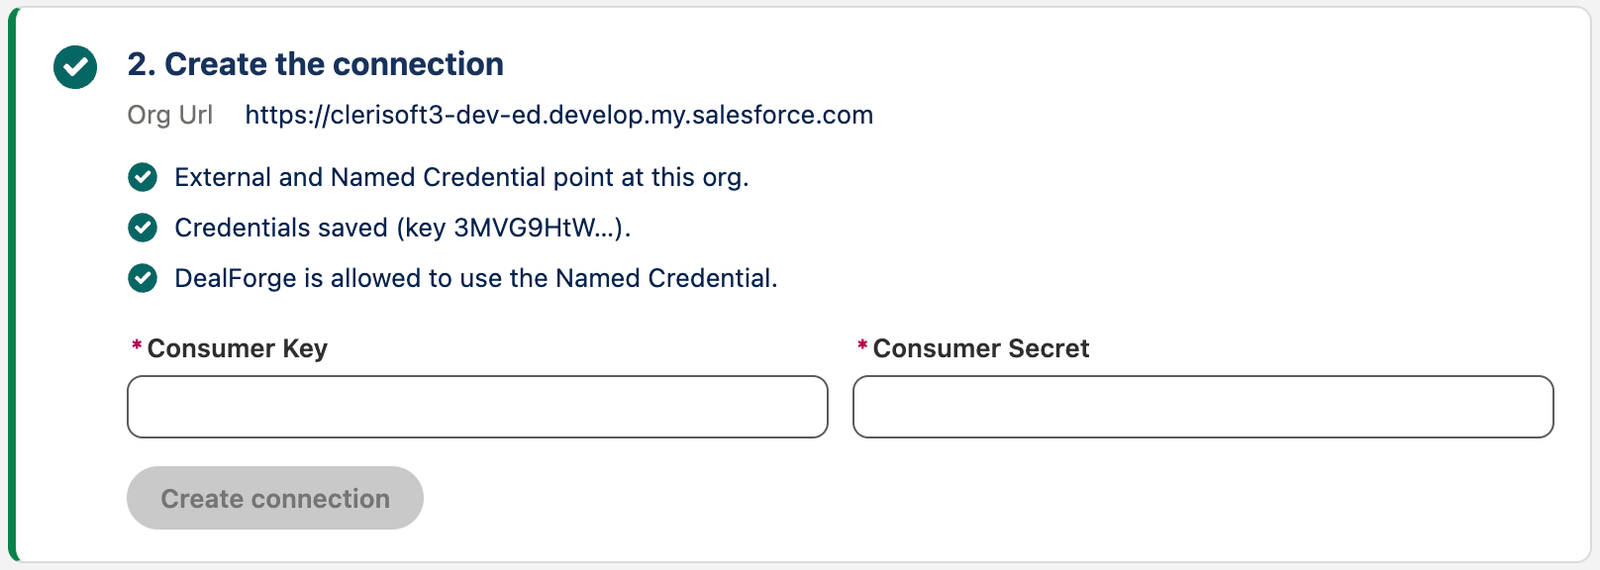
- On the DealForge Setup page, paste the Consumer Key and Consumer Secret you copied.
- Click Create connection.
- In Salesforce Setup, open Named Credentials, edit DealForge Loopback, select Enabled for Callouts, and save.
- Return to DealForge Setup and click the refresh icon. The checks in this step turn green.
images/setup-launchpad/setup-step2.pngCreate the connectionStep 3: Give DealForge users access
Click Grant access. DealForge creates the DealForge Loopback Access permission set and assigns it to you and to everyone who already has a DealForge permission set group.
People you assign through License Manager receive this permission set automatically. If you assign DealForge access in Setup instead, click Grant access again so they receive it too. To add more users to the apps, see the License Manager guide.

images/setup-launchpad/setup-step3.pngGrant accessTest the Setup
- On the DealForge Setup page, click Run test in Step 4.
- Confirm the result reads Connected — the API call succeeded. and the header shows Setup complete.
- Open CD Hub from the App Launcher and confirm your context definitions load.

images/setup-launchpad/test-setup.pngRun the connection testIf the test does not pass, check the following:
| What you see | What to check |
|---|---|
| Callout blocked for named credential | Enabled for Callouts is not selected on the DealForge Loopback Named Credential. Select it and save. |
| HTTP 401 or 403 | The Run As user in the External Client App policy is missing, or does not have access to context definitions. |
| Not authorized to use the credential | The user running the test does not have the DealForge Loopback Access permission set. Click Grant access. |
| License Invalid | Wait about a minute after installing, then refresh. If it persists, open License Manager or contact Clerisoft. |
The Launchpad
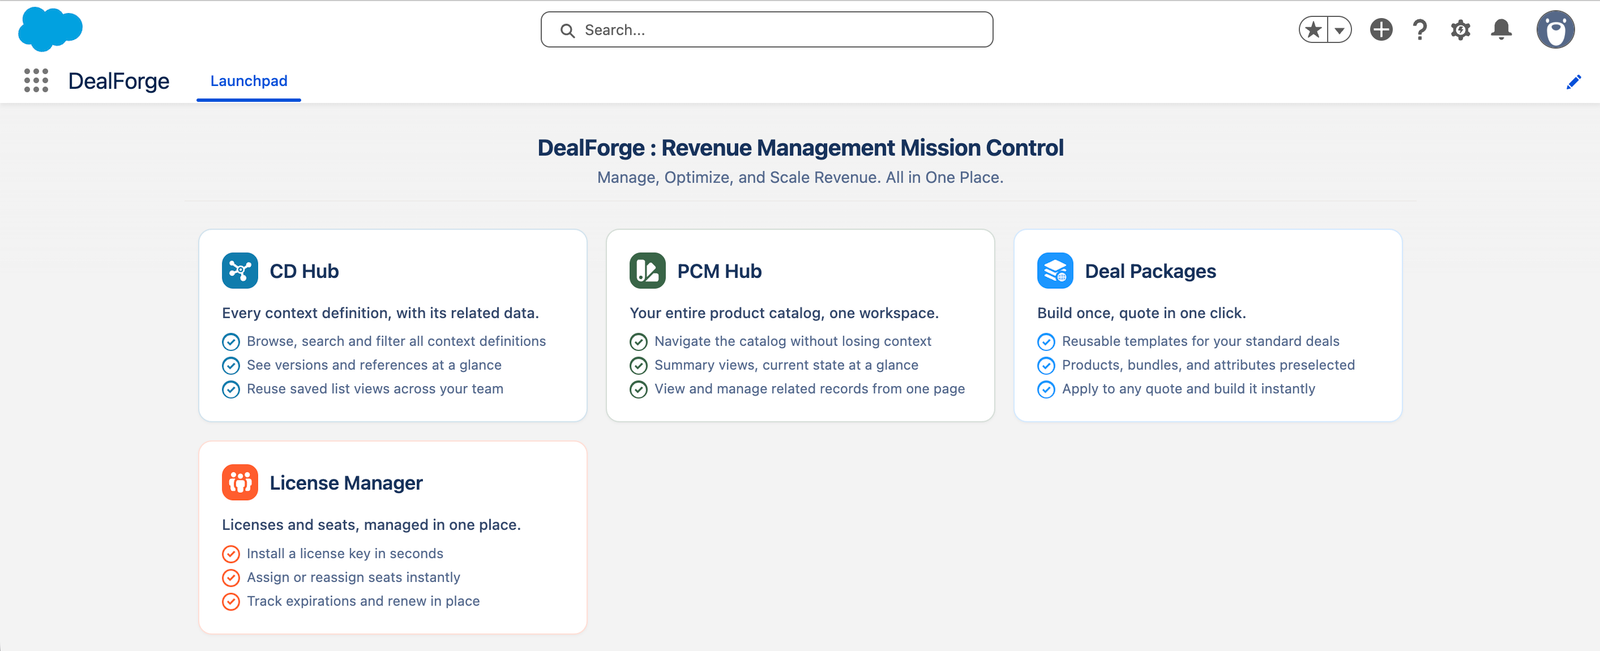
Once setup is complete, opening DealForge from the App Launcher takes you to the Launchpad, the home page titled Revenue Management Mission Control. It shows a tile for each DealForge app, so you can open Deal Packages, PCM Hub or CD Hub from one place. The counts at the top let you jump to the apps you can use and the ones you do not have access to yet.
images/setup-launchpad/launchpad.pngThe LaunchpadOpen the app you need from the Launchpad, or see its guide:
Send Feedback
Every DealForge app has a Send Feedback button in its header bar. Use it to report a problem with setup, ask a question, or suggest an improvement. For details, see the Sending Feedback guide.