
Overview
License Manager is where you install your DealForge license, see how many seats are in use, and keep track of trials and renewals.
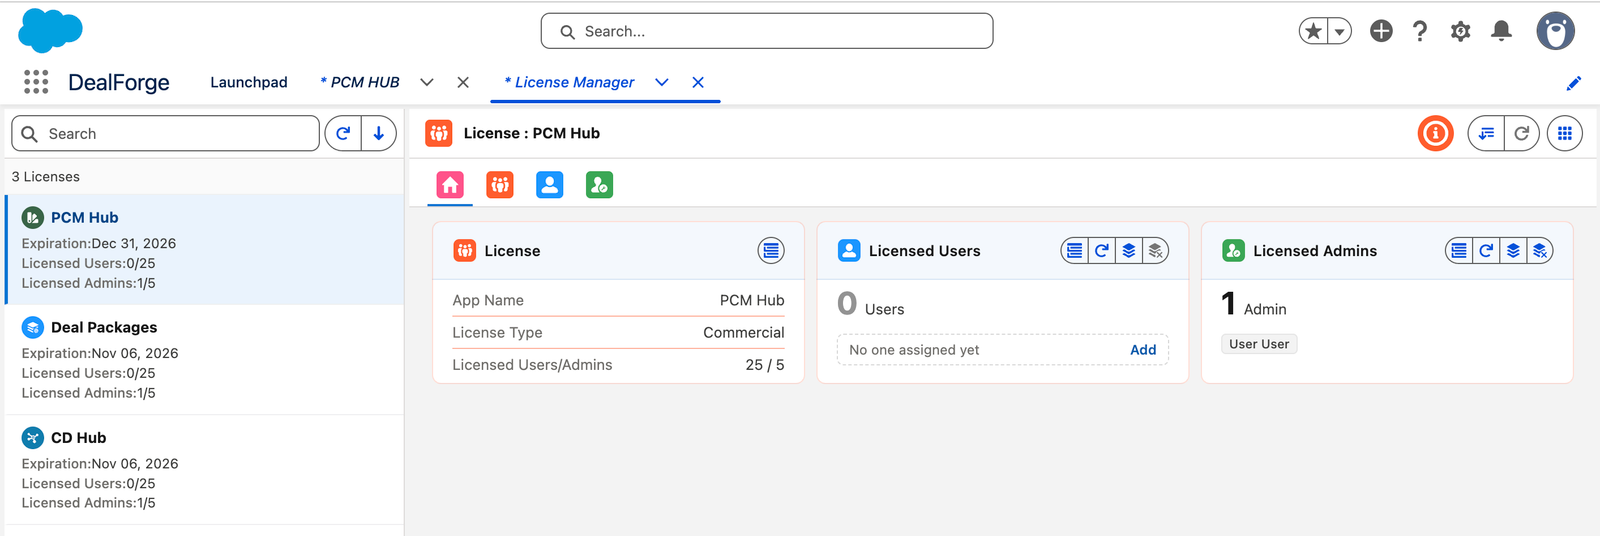
images/license-manager/overview.pngLicense Manager overviewWhy Use License Manager
- Get started in seconds. Install a license key in a few clicks.
- Control who has access. Assign or reassign seats instantly.
- Never miss a renewal. Track expirations and renew in place.
User Personas
| Persona | What they do | How they use License Manager |
|---|---|---|
| DealForge Administrator | Responsible for the DealForge installation. | Installs the license key and assigns seats to users. |
| App Administrator | Manages a specific DealForge app and its users. | Checks seat usage and adds or moves users. |
| Business Owner | Accountable for the subscription. | Tracks trial and renewal dates. |
App Layout
License Manager opens as a two-pane workspace: a list of your DealForge apps on the left and the selected app's license on the right.
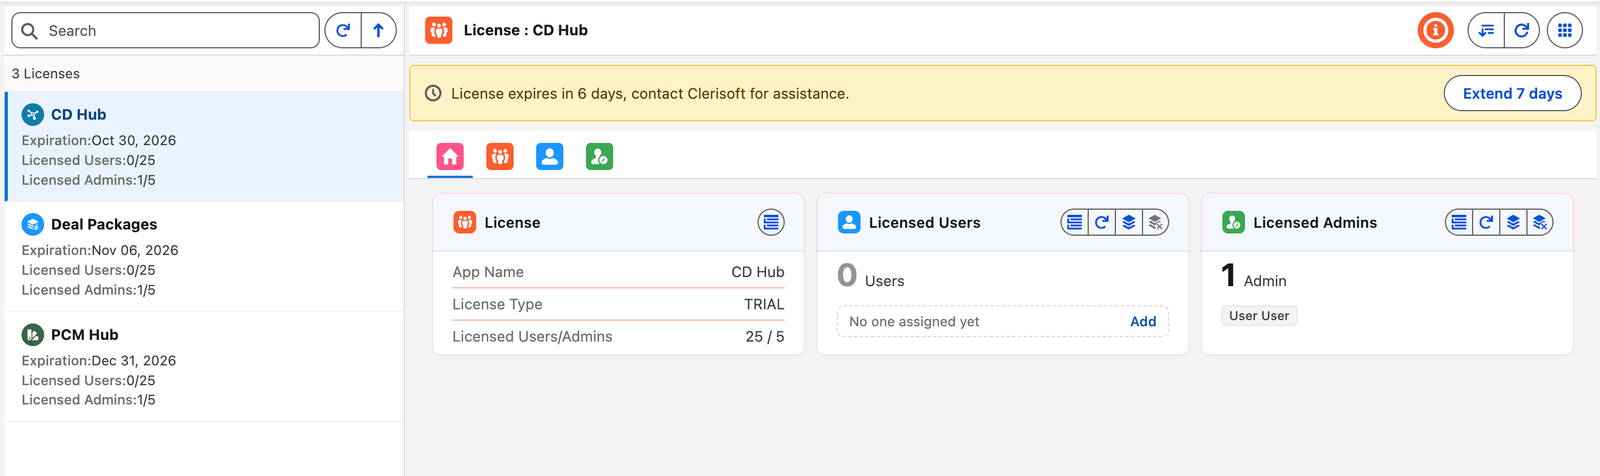
images/license-manager/app-layout.pngThe License Manager workspace, with each area numbered below- Header bar. Shows the selected app's icon and the title License : PCM Hub. The action buttons on the right are listed under Header bar actions.
- Search box. Type to narrow the app list by name. Use the clear (x) icon inside the box to reset it.
- Refresh and sort. Next to the search box, a connected pair of buttons reloads the list and switches between ascending and descending order. License Manager has no filter button, because the list only ever holds the few apps on your license.
- Result count. A line under the toolbar shows how many apps are listed.
- App list. Each licensed app is a tile with its icon, name and key facts: its expiration date and how many licensed users and licensed admins it has seats for. Click a tile to see that app's license on the right.
- Trial banner. A reminder that appears under the header when the selected app's license is a trial that is close to expiring. It states the days left and has an Extend 7 days button.
- Tabs. The right panel has four tabs: Overview (a read-only summary), License (the license details), Licensed Users and Licensed Admins.
- Right panel. The content of the selected tab.
Header bar actions
The buttons in the header bar act on the selected app. Hover over any button to see its tooltip. A button is grayed out when it does not apply, for example when you are not an administrator of that app.
| Icon | Action | What it does |
|---|---|---|
| Guidance | Opens app-specific guidance for using License Manager. | |
| Install New License | Opens a popup where you paste and install a new license key for the selected app. | |
| Extend License | For a trial license, extends it by 7 days. For any other license, opens a popup to send a renewal request. It becomes available as the expiration date approaches, and the tooltip explains why while it is grayed out. | |
| Send Feedback | Opens a form to report a bug, request a feature or share feedback with Clerisoft. See Sending Feedback. | |
| App launcher | Hover to see every DealForge app and jump to any of them. |
Extend License appears only once the selected app has a license key. Extend License is for administrators of that app, and is grayed out for everyone else.
App list
Each tile in the left list stands for one licensed app. Licenses are managed per app, so selecting a tile changes everything on the right, including the header title, the trial banner and the tabs.
License Manager manages the licenses of every DealForge app from one place, but the right side always shows one app. Check the header title to be sure which app you are looking at before you install or extend a license.
Reading License Details
Select an app in the left list, then look at its license in two places.
The Overview tab
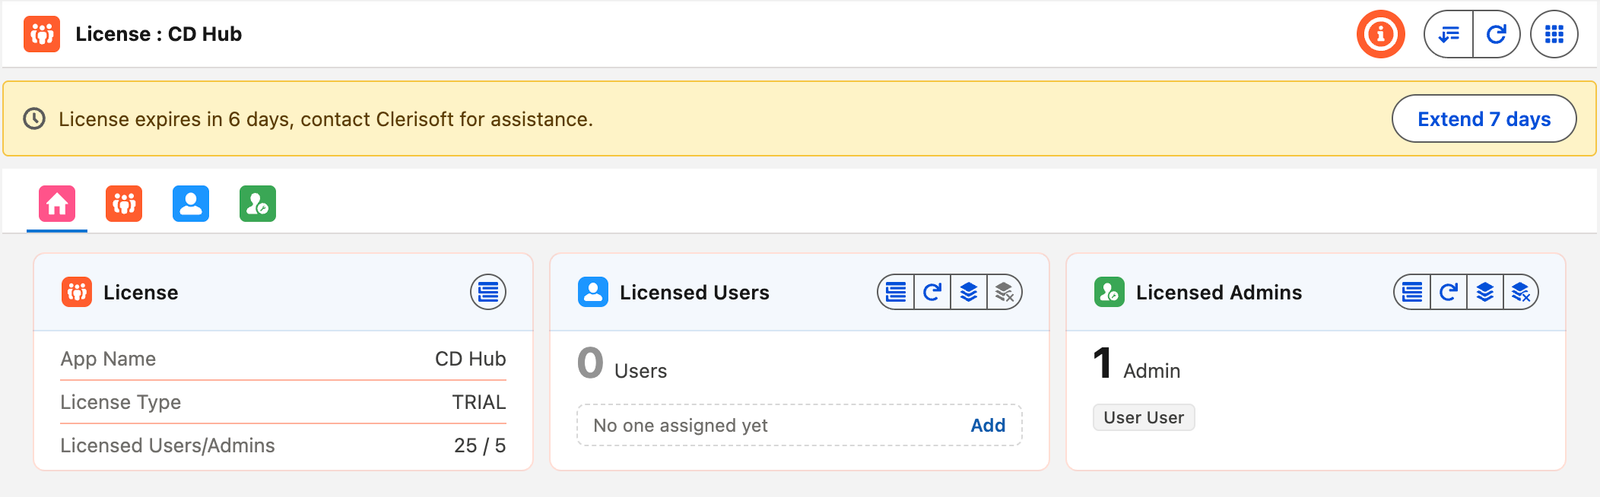
The Overview tab opens on a License tile that sums the license up:
| Field | What it shows |
|---|---|
| App Name | The app the license belongs to. |
| License Type | The kind of license, for example a trial or a commercial license. |
| Licensed Users/Admins | The total seats on the license, users first and then admins, for example 6 / 4. |
Hover over the tile to open a Quick View with the full set of details, or click Open Tab to go to the License tab. Beside it are tiles for Licensed Users and Licensed Admins. Each shows how many people hold a seat, with the first few names, and has its own Refresh, Assign and Unassign buttons.
The License tab
The License tab shows every detail of the selected app's license, read-only, in three cards. Each card has a title bar you can collapse, and shows how many fields it holds.
images/license-manager/license-tab.pngThe License tab, with the General, Licensed Users and Licensed Admins cards| Card | Fields |
|---|---|
| General | App Name and License Type. |
| Licensed Users | Licensed Users, as assigned/limit, and the Expiration Date for user seats. |
| Licensed Admins | Licensed Admins, as assigned/limit, and the Expiration Date for admin seats. |
Read assigned/limit as seats used out of seats bought. 3/5 means three people hold a seat and five were licensed, so two are free. A dash means this app's license has no block of that kind.
Users and admins have their own expiration dates, so check the date on the card that matches the seat you care about. The app tile in the left list shows the expiration date too.
One license key can carry licenses for several DealForge apps at once, such as Deal Packages and PCM Hub, each with its own seats and dates. License Manager shows them app by app, so details never mix between apps.
Adding Users
A Licensed User is someone who holds a user seat for the selected app. They can open and use the app, but cannot manage its license. Seats are given through that app's permission set group, so assigning a person here gives them access straight away.
Open the Licensed Users tab. Its title shows how many people hold a seat, for example Licensed Users (4), and the table lists each one with their Name, Email, Title, Role and Profile.
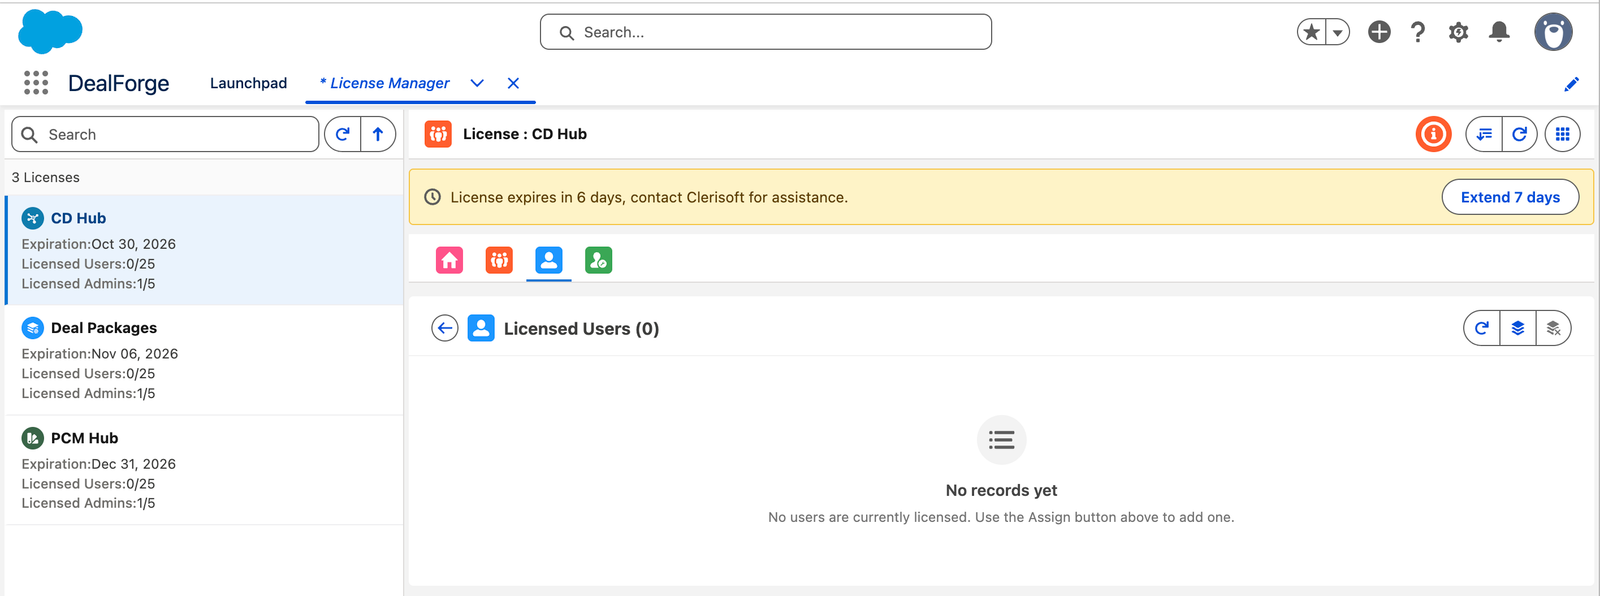
images/license-manager/licensed-users.pngThe Licensed Users tab, with its Refresh, Assign and Unassign buttonsThe buttons in the title bar are:
| Icon | Action | What it does |
|---|---|---|
| Refresh | Reloads the latest seat assignments for this app. | |
| Assign | Opens the Assign Users popup so you can give people a seat. | |
| Unassign | Opens the Unassign Users popup so you can take seats away. It is grayed out when nobody holds a seat. |
Assign and Unassign are for administrators of the app. They are grayed out for everyone else, who can still read the list.
Step 1: Open the Assign Users popup
Click Assign. If nobody has a seat yet, the tab says so and you can start from there.
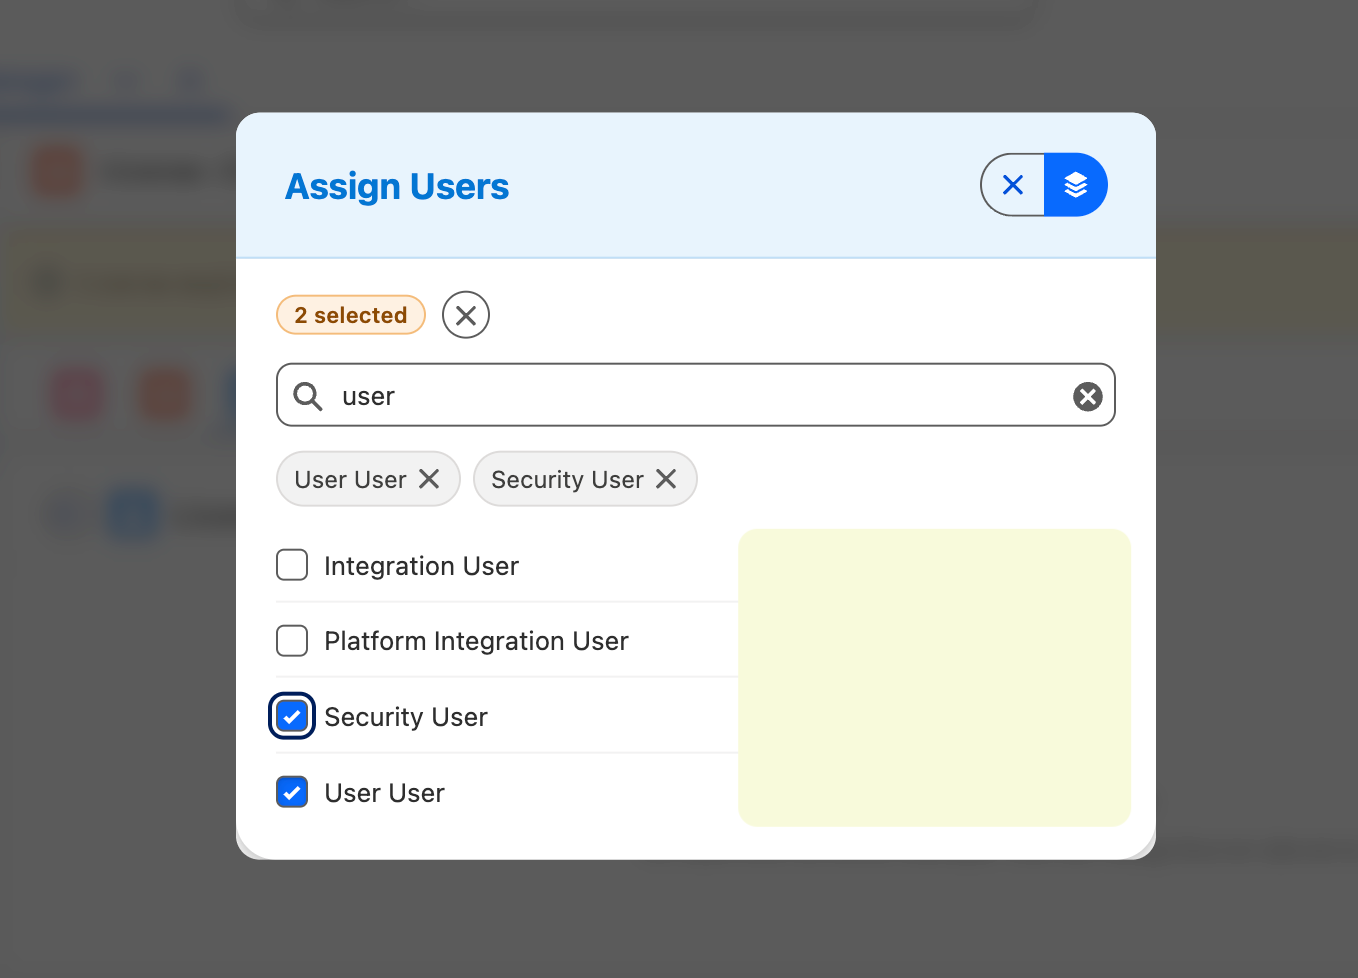
images/license-manager/assign-users.pngThe Assign Users popup, with search results and the people chosen so farStep 2: Search for people
Type at least two characters of a person's name or email in the search box. Results appear as you type, up to 25 at a time. Only active users who do not already hold a seat for this app are listed.
Step 3: Tick the people you want
Tick the checkbox beside each person. You can search again for someone else and keep ticking: the people you have already ticked stay chosen, and are listed as removable chips under the search box. A selection bar shows how many are chosen, with a Clear button to start again.
Step 4: Assign
Click Assign, which stays grayed out until you have chosen at least one person. When it finishes, the popup closes, a message tells you how many users were assigned, and the table updates.
Taking a seat away
Click Unassign. The Unassign Users popup lists everyone who holds a seat. Search to narrow the list, tick the people to remove and click Unassign. They lose access to the app, and the seat is free to give to someone else.
A message in the popup explains why. One common cause is that the app's permission set group is still recalculating after a license change, and the fix is to wait a moment and try again.
Adding Admins
A Licensed Admin holds an admin seat for the selected app. Admins can use the app and also manage it, including its license. Their seats are separate from user seats, and they are counted and dated separately.
Open the Licensed Admins tab. It works exactly like the Licensed Users tab, so the steps in Adding Users apply here too:
- Click Assign to open the Assign Admins popup.
- Search by name or email, with at least two characters.
- Tick the people you want. Your selection is kept as you search again.
- Click Assign.
To remove an admin seat, click Unassign to open the Unassign Admins popup, tick the people and confirm.
The title shows the count, for example Licensed Admins (2), and the table has the same columns as Licensed Users. You can also use the Refresh, Assign and Unassign buttons on the Licensed Admins tile on the Overview tab.
Giving someone an admin seat does not give them a user seat, and the other way round. Each is counted against its own limit on the License tab.
Loading a New License
Install a license key when you first set up DealForge, when you buy more apps or seats, or when Clerisoft sends you a renewed key.
Before you start
- Have the license key from Clerisoft, copied as one block of text.
- You need to be an administrator of the app you are installing for.
- Select the app in the left list first. The popup is for that app.
Step 1: Open the Install popup
In the header bar, click Install New License.
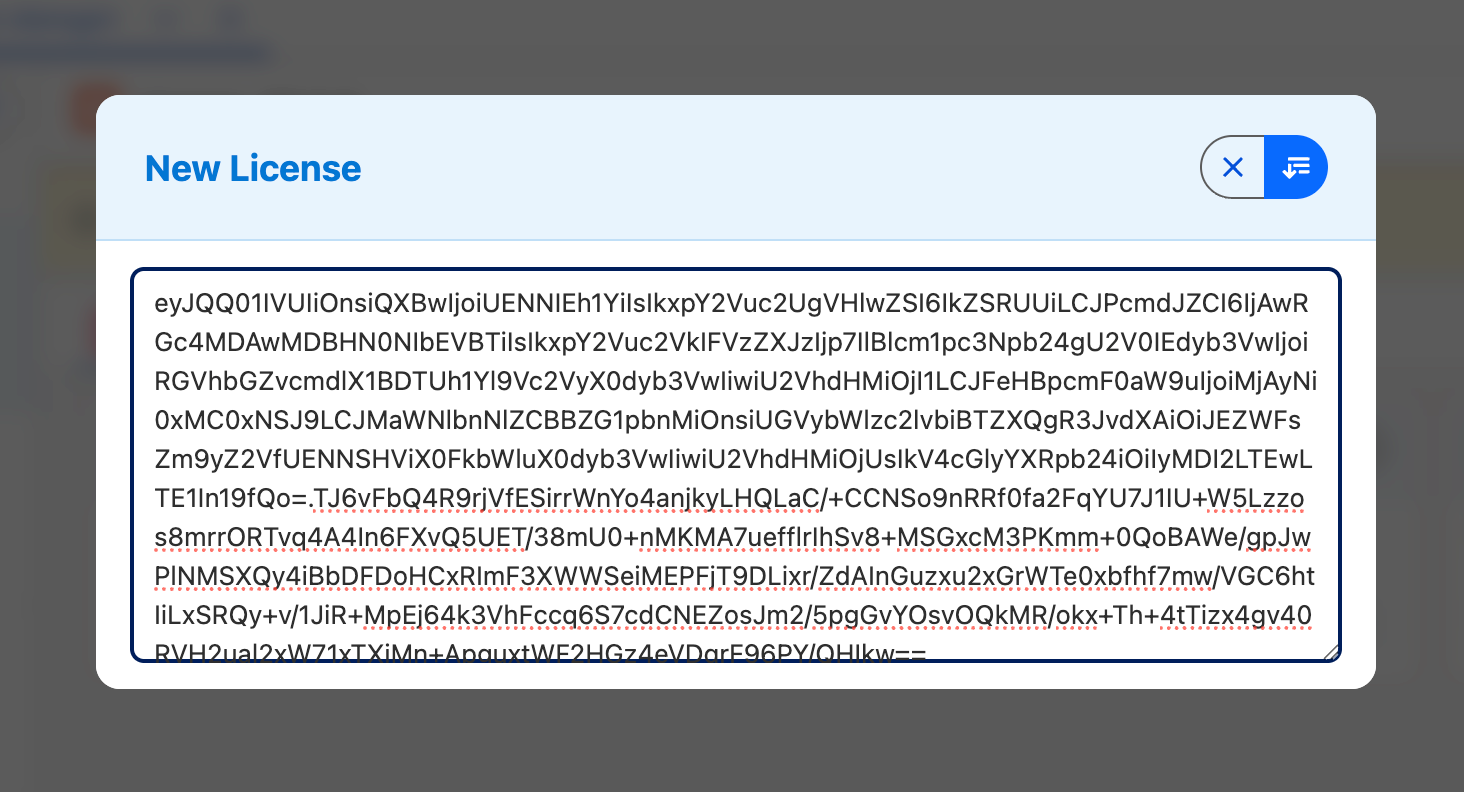
images/license-manager/install-license.pngThe Install New License popup with the key pasted inStep 2: Paste the key
Paste the whole key into the text box. The Install License button in the popup header stays grayed out until there is something in the box.
Step 3: Install
Click Install License. The popup is locked and shows a spinner while the key is checked and applied. This can take a short while, because the key is deployed to your org and the popup waits until it is live.
A key is checked against Clerisoft's signature first. If it was changed, cut short or is not a DealForge key, it is rejected with a message and nothing is installed.
When it succeeds, the popup closes and a message reads License installed: the license key has been applied. The tiles, tabs and trial banner refresh with the new details.
A key can cover just one app
A key does not have to cover every app. If it carries only one app's license, only that app's license is added or replaced. The licenses for your other apps are left exactly as they were.
If it does not work
| What you see | What to do |
|---|---|
| The key is rejected | Copy it again from the email in one piece, without extra spaces or missing characters, and paste it again. |
| The license was queued but has not been applied yet | The deployment did not finish. Check Setup > Deployment Status for a failed deployment, fix what it reports, then install again. |
| A message that you do not have access | Only administrators of the app can install a license. Ask one to do it, or ask your Salesforce administrator to give you the admin permission set. |
Extending a License
Extending works differently for a trial and for a commercial license. The Extend License button in the header bar covers both, and it only appears once the selected app has a license key.
Extend License is grayed out until you can use it. Hover over it to see why, for example that you need admin access, or when the window opens.
Extending a trial
A trial license can be extended once, by 7 days, and only during the last 7 days of the trial.
- Open the app's license in License Manager. A trial banner appears under the header, for example License expires in 3 days, contact Clerisoft for assistance.
- Click Extend 7 days in the banner, or Extend License in the header. They do the same thing.
- A message confirms that the trial now runs 7 days longer. The new date can take a few seconds to show.
After the extension is used, the banner and the button go away, and the tooltip says so. To keep using the app after that, install a full license from Clerisoft. If the trial has already ended, the extension window has closed, and the tooltip says to contact Clerisoft.
Only an administrator of the app can extend its trial.
Renewing a commercial license
A commercial license is renewed by asking Clerisoft, and the button helps you do that. It becomes available 30 days before expiration. Before then, the tooltip shows when it opens.
- Click Extend License. The Renew License popup opens.
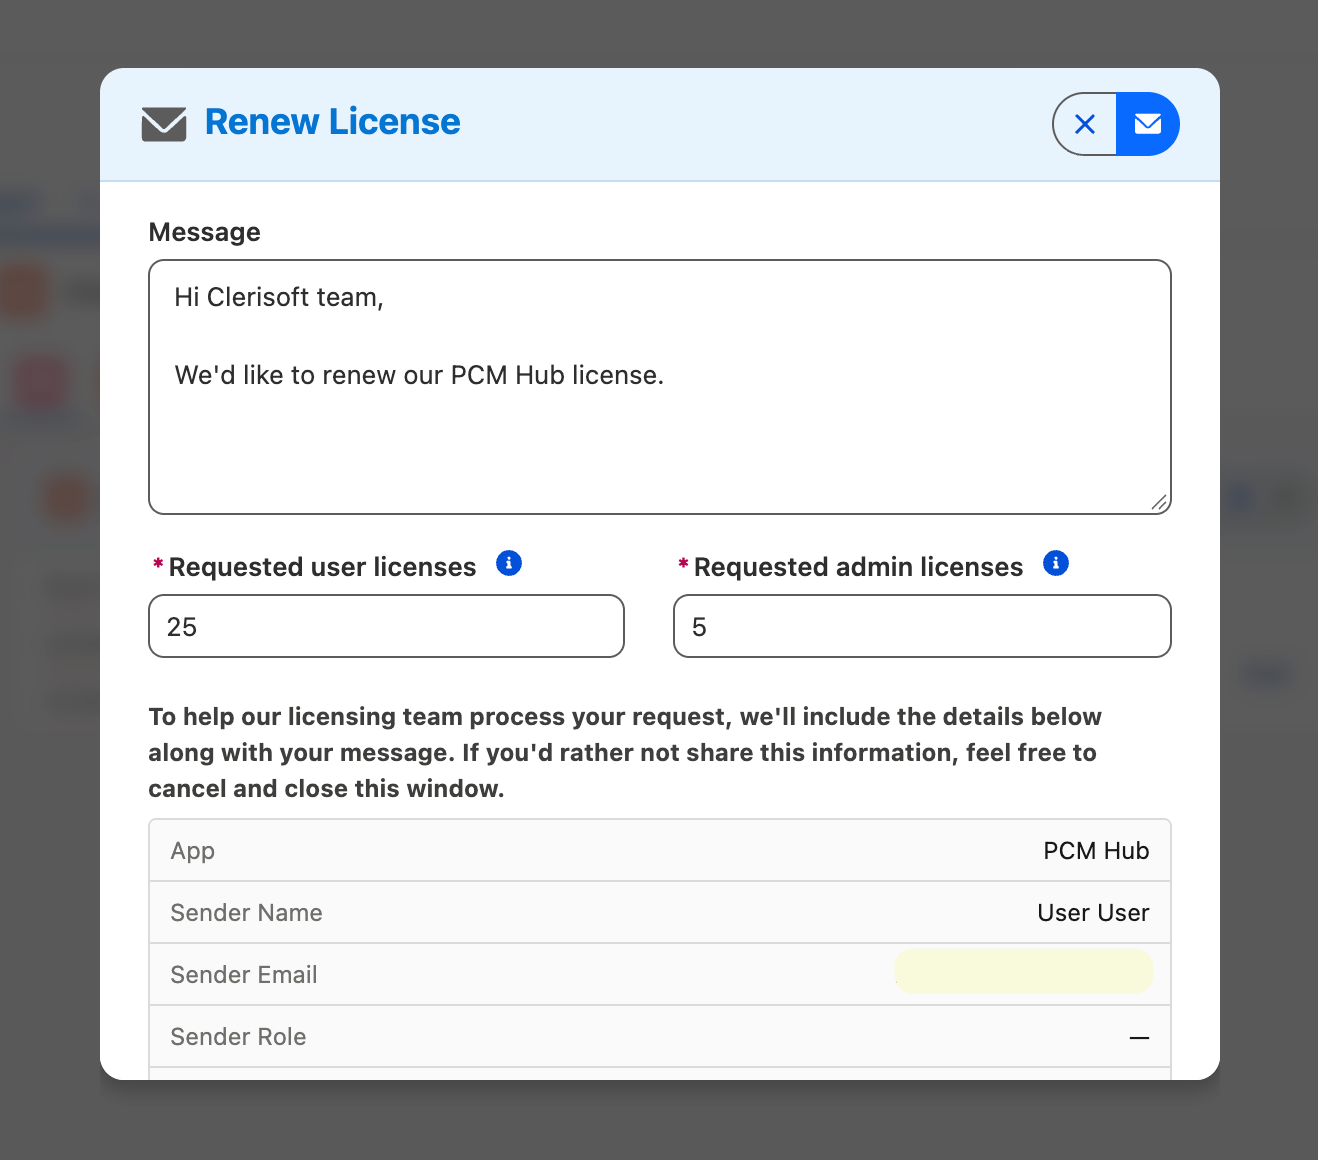
images/license-manager/renew-license.pngThe Renew License popup, ready to send- Review the email that will be sent:
- From is you. To is the Clerisoft Licensing Team, and cannot be changed.
- Cc copies colleagues, separated by commas. You are always copied, and you can add up to five more people.
- Subject and Message are filled in for you, and you can edit them.
- Requested user licenses and Requested admin licenses are the seat counts you want after renewal. They start at your current seats, and the help icon shows the current number. Enter a whole number from 1 to 100000.
- Under the message, a note explains that details about you and your org are added to the request so that Clerisoft can process it. Cancel if you would rather not send them.
- Click Send. It stays grayed out until the subject, message and seat counts are valid and any Cc addresses are well formed.
A message confirms that the request was sent and that you were copied. Clerisoft replies with a new key, which you then install as described in Loading a New License.
For a commercial license, Extend License sends a request. The expiration date changes only after you install the new key Clerisoft sends back.
Sending Feedback
Click Send Feedback in the header bar to report a bug, request a feature or share feedback with Clerisoft without leaving License Manager. Choose the app or apps and the kind of feedback, write your message, and send it. Your name, role, profile and org details are added for you, and you are copied on the email.
The full steps and what is sent are in the Sending Feedback guide.